Introducing Popcorn 🍿 - A social media app for shows 📺
With Popcorn you can connect with others watching the same shows and is a dedicated space for film related discussions 🎉
Hey people 👋🏼!
This is my first Hackathon and first post on Hashnode! Since completing a coding bootcamp and starting a full time job, I have been looking for motivation to continue building projects and working on my tech skills, so thank you Hashnode for giving me just that!
Why Popcorn? 🍿
Popcorn is a social media app where you can create posts and have discussions related to tv series and movies, see a list of top trending shows, search for something to watch and add to your list.
The idea for Popcorn came from a friend after he got a Netflix account and was looking for recommendations. We noticed people were always asking and sharing their reviews and thoughts on what they're watching and we thought maybe a dedicated social media app for this community would be a good idea.
Process 🗺
I made my first commit to the project on Aug 10th, after spending a few days coming up with a plan. I first used MoqUps to create a wireframe and did some research into the best tech stack to use. I have never completed such a big project by myself before, so I wanted to make sure to pick technologies with good documentation, and are widely used so that I could easily find help online if I got stuck.
Tech Stack 💻
I decided to use MERNG (MongoDB, Express.js, React.js, Node.js, GraphQL) stack due to its popularity and I had learnt most of these technologies during my coding bootcamp. GraphQL and Apollo-Server were new to me, but I've seen discussions about the flexibility and simple implementation and thought it would be greatly suited for a social media app. I haven't used Semantic UI before but it looks pretty good and I wanted to try it out!
Netlify - for application hosting
Heroku - for server hosting
Auth0 - User authentication
Semantic UI React - UI/UX
Building Popcorn ⚙️
Back-end: apollo-server graphql mongoose dotenv
I started with setting up the server, database and installing necessary dependencies.
npm install apollo-server, graphql mongoose dotenv
After requiring the dependencies, I set up the server connection to my MongoDB database using dotenv to conceal my connection string:
const dotenv = require('dotenv');
const { ApolloServer } = require('apollo-server');
const mongoose = require('mongoose');

const typeDefs = require('./graphql/typeDefs');
const resolvers = require('./graphql/resolvers');

const server = new ApolloServer({
    typeDefs,
    resolvers,
    cors: {
        origin: '*',
        credentials: true
    },
});

dotenv.config();
const connectionUrl = process.env.MONGODB;

mongoose.connect(connectionUrl, { useNewUrlParser: true, useUnifiedTopology: true })
    .then(() => {
        console.log('MongoDB Connected 🌱');
        return server.listen({ port: process.env.PORT || 5000 });
    })
    // Running on express via Apollo Server
    .then(res => {
        console.log(`Server running at ${res.url} 🚀`)
    })
CORS and Express.js is built into apollo-server already so I just had set the origin and start the server. Next, I created the schema and resolvers for Posts and Users and defined the typeDefs - the object types. After a few tests posts to ensure everything was working, I moved all the code so far into api folder and moved to the frontend of the application.
Front-end: react react-router-dom auth0-react @apollo/client graphql semantic-ui- semantic-ui-react moment axios
During my bootcamp, we learnt to create React applications from scratch but I decided for simplicity and try something different to use Create React App - which is basically a bootstrapped project that doesn't require any configuration and webpack is all set up too!
npm create-react-app react-client
cd react-client
npm start
I then moved on to Authentication using Auth0. I found documentation with step by step guides for React applications, and they were really easy to follow. I first created an account by connecting my Github, and then creating a new application and added necessary config on the Auth0 dashboard. I was able to connect Auth0 to my mongoDB database by follow this tutorial by Auth0. The process was so simple - I just edited the pre-made templates in Authentication -> Database Connections -> Create DB Connection -> Custom Database -> Database Action Scripts
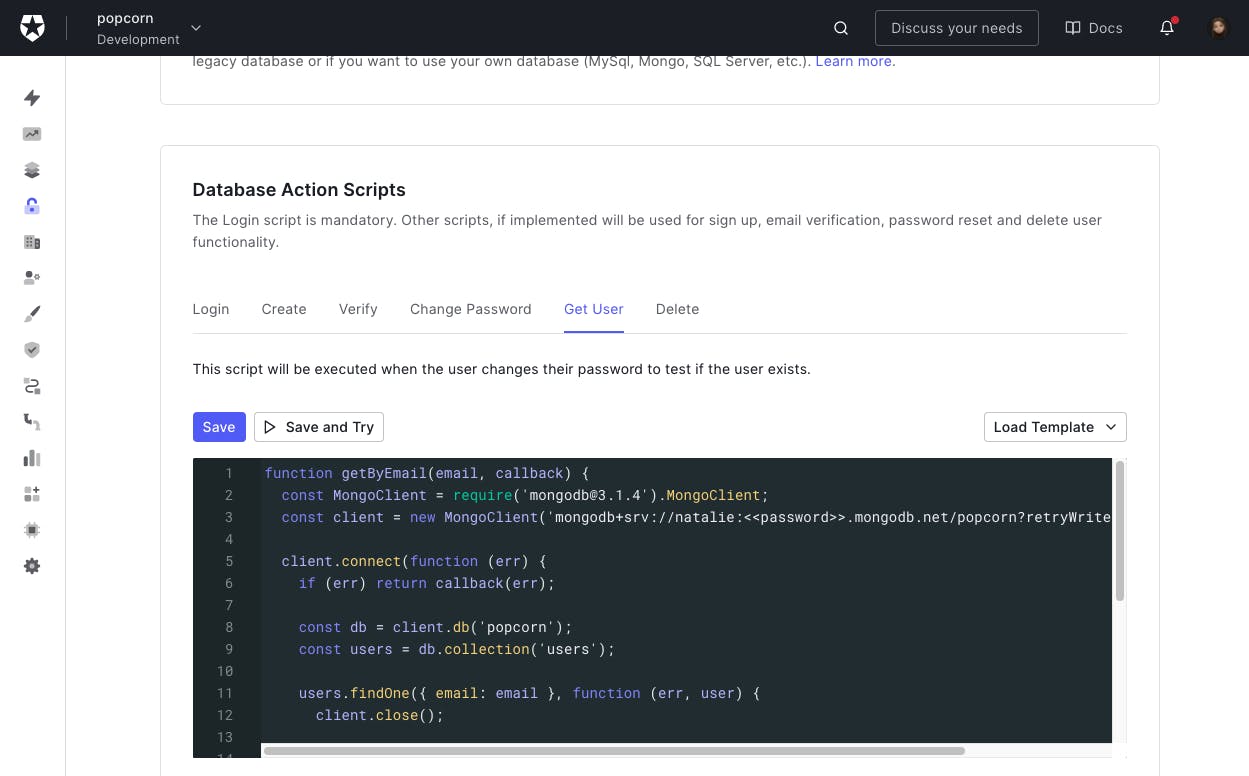
My next step was to install Auth0 React SDK which the integration of Auth0 with my React application by wrapping my root component with an Auth0Provider.
npm install @auth0/auth0-react react-router-dom
import React from "react";
import ReactDOM from "react-dom";
import App from "./App";
import { Auth0Provider } from "@auth0/auth0-react";

  const domain = process.env.REACT_APP_AUTH0_DOMAIN;
  const clientId = process.env.REACT_APP_AUTH0_CLIENT_ID;

ReactDOM.render(
  <Auth0Provider
    domain="domain"
    clientId="clientId"
    redirectUri={window.location.origin}
  >
    <App />
  </Auth0Provider>,
  document.getElementById("root")
);
I then added Login and Sign Up buttons to my application by creating components and using the useAuth0() hook. loginWithRedirect() redirects users to the Auth0 Universal Login Page, where Auth0 can authenticate them and redirect users back to the application if successful.
import React from "react";
import { useAuth0 } from "@auth0/auth0-react";

const LoginButton = () => {
  const { loginWithRedirect } = useAuth0();
  return (
    <button
      className="btn btn-primary btn-block"
      onClick={() => loginWithRedirect()}
    >
      Log In
    </button>
  );
};

export default LoginButton;
Auth0 also has a simple way to protect routes, so they are only available when users are logged in.
import React from "react";
import { Route } from "react-router-dom";
import { withAuthenticationRequired } from "@auth0/auth0-react";
import { Loading } from "../components";

const ProtectedRoute = ({ component, ...args }) => (
  <Route
    component={withAuthenticationRequired(component, {
      onRedirecting: () => <Loading />,
    })}
    {...args}
  />
);

export default ProtectedRoute;
import ProtectedRoute from "./auth/protected-route";

const App = () => {
    return (
        <>
            <NavBar />
            <main className="main-layout">
                <SideBar />
                <ScrollToTop />
                <Switch>
                    <ProtectedRoute path="/" exact component={Home} />
                    <ProtectedRoute exact path={`/posts/:postId`} component={SinglePost} />
                    <Route exact path="/search" component={SearchPage} />
                    <ProtectedRoute exact path={`/mylist`} component={MyList} />
                </Switch>
                <Footer />
                <RightSideBar />
            </main>
        </>
    );
};

export default App;
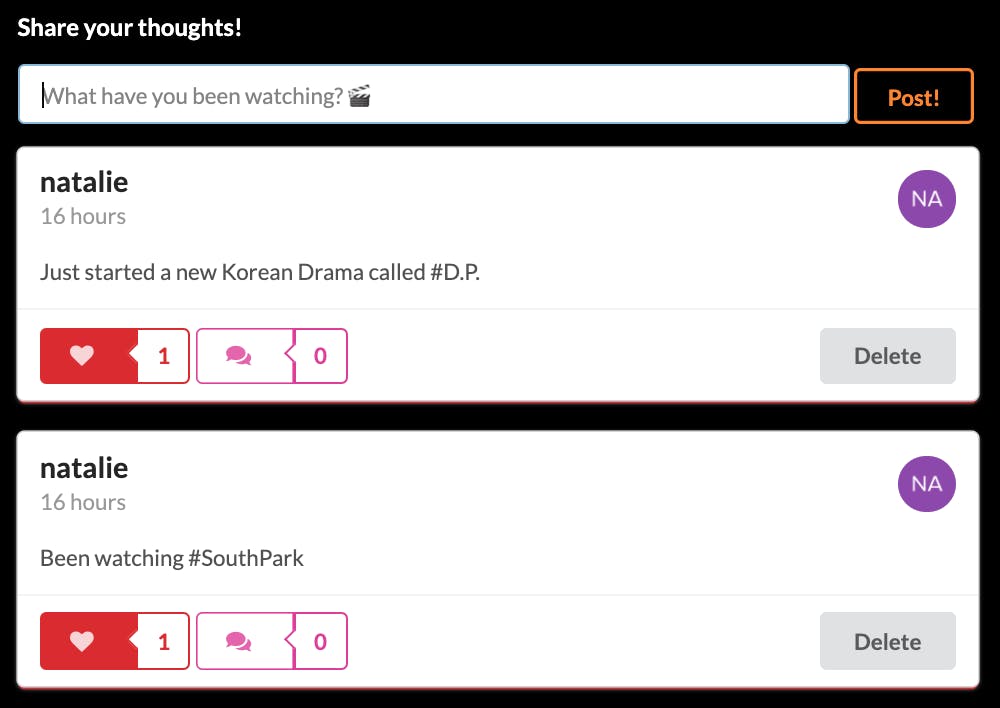
With Authentication set up, I moved to the main section of the app which is the Feed. This section includes CreatePost component and Posts. Semantic UI React is used to easily style these components.
install semantic-ui-css and semantic-ui-react
To actually add the CRUD functionality I had to install and set up Apollo Client and GraphQL.
npm install @apollo/client graphql
import React from 'react';
import ReactDOM from 'react-dom';
import { BrowserRouter as Router } from "react-router-dom";
import Auth0ProviderWithHistory from "./auth/auth0-provider-with-history";
import { ApolloClient, InMemoryCache, ApolloProvider } from "@apollo/client";

import App from './App';

const client = new ApolloClient({
  uri: 'https://nat-popcorn.herokuapp.com/',
  cache: new InMemoryCache(),
  connectToDevTools: true
});

ReactDOM.render(
  <React.StrictMode>
    <Router>
      <Auth0ProviderWithHistory>
        <ApolloProvider client={client}>
          <App />
        </ApolloProvider>
      </Auth0ProviderWithHistory>
    </Router>
  </React.StrictMode>,
  document.getElementById("root")
);
All I had to do was initialise Apollo Client, adding the uri (the URL of GraphQL server) which I updated when I deployed the server on Heroku. I wrapped my React app with an ApolloProvider and was good to go! To fetch data I used useQuery and wrapping my query in gql template literal:
import { gql, useQuery } from '@apollo/client';

const { loading, error, data } = useQuery(FETCH_POSTS_QUERY);

export const FETCH_POSTS_QUERY = gql`
  {
    getPosts {
      id
      body
      createdAt
      username
      userAvatar
      likeCount
      likes {
        username
      }
      commentCount
      comments {
        id
        username
        createdAt
        body
      }
    }
  }
`;
Similarly, I used the useMutation hook to create POST requests. Here is a short example for when a user likes a post:
import { gql, useMutation } from '@apollo/client'

 const [likePost] = useMutation(LIKE_POST_MUTATION, {
        variables: { postId: id }
      });

const LIKE_POST_MUTATION = gql`
    mutation likePost($postId: ID!){
        likePost(postId: $postId){
            id
            likes{
                id username
            }
            likeCount
        }
    }
`
When I completed all the CRUD functionality, I did some research into a API database for movies and TV Shows. I found themoviedb which had pretty good documentation and I signed up for an API key. I installed axios, a promise based HTTP client, and created a RightSideBar component to display the top trending movies and shows. I used the useEffect React hook to ensure the data was always updated and fetched when the page loads.
const RightSideBar = () => {
    const [trendingData, setTrendingData] = useState();
    const [error, setError] = useState();

    useEffect(() => {
        async function fetchTrending() {
            try {
                const token = process.env.REACT_APP_TOKEN;
                const options = {
                    headers: {
                        "Authorization": `Bearer ${token}`,
                        "Content-Type": `application/json;charset=utf-8`
                    }
                };
                const { data } = await axios.get(`https://api.themoviedb.org/3/trending/all/day`, options)
                if (data.err) {
                    throw new Error(data.err)
                }
                setTrendingData(data.results)
            } catch {
                console.warn("There's an error!!! Cannot fetch data!")
                setError('Oops, please try again!')
            }
        } fetchTrending();
    }, []);
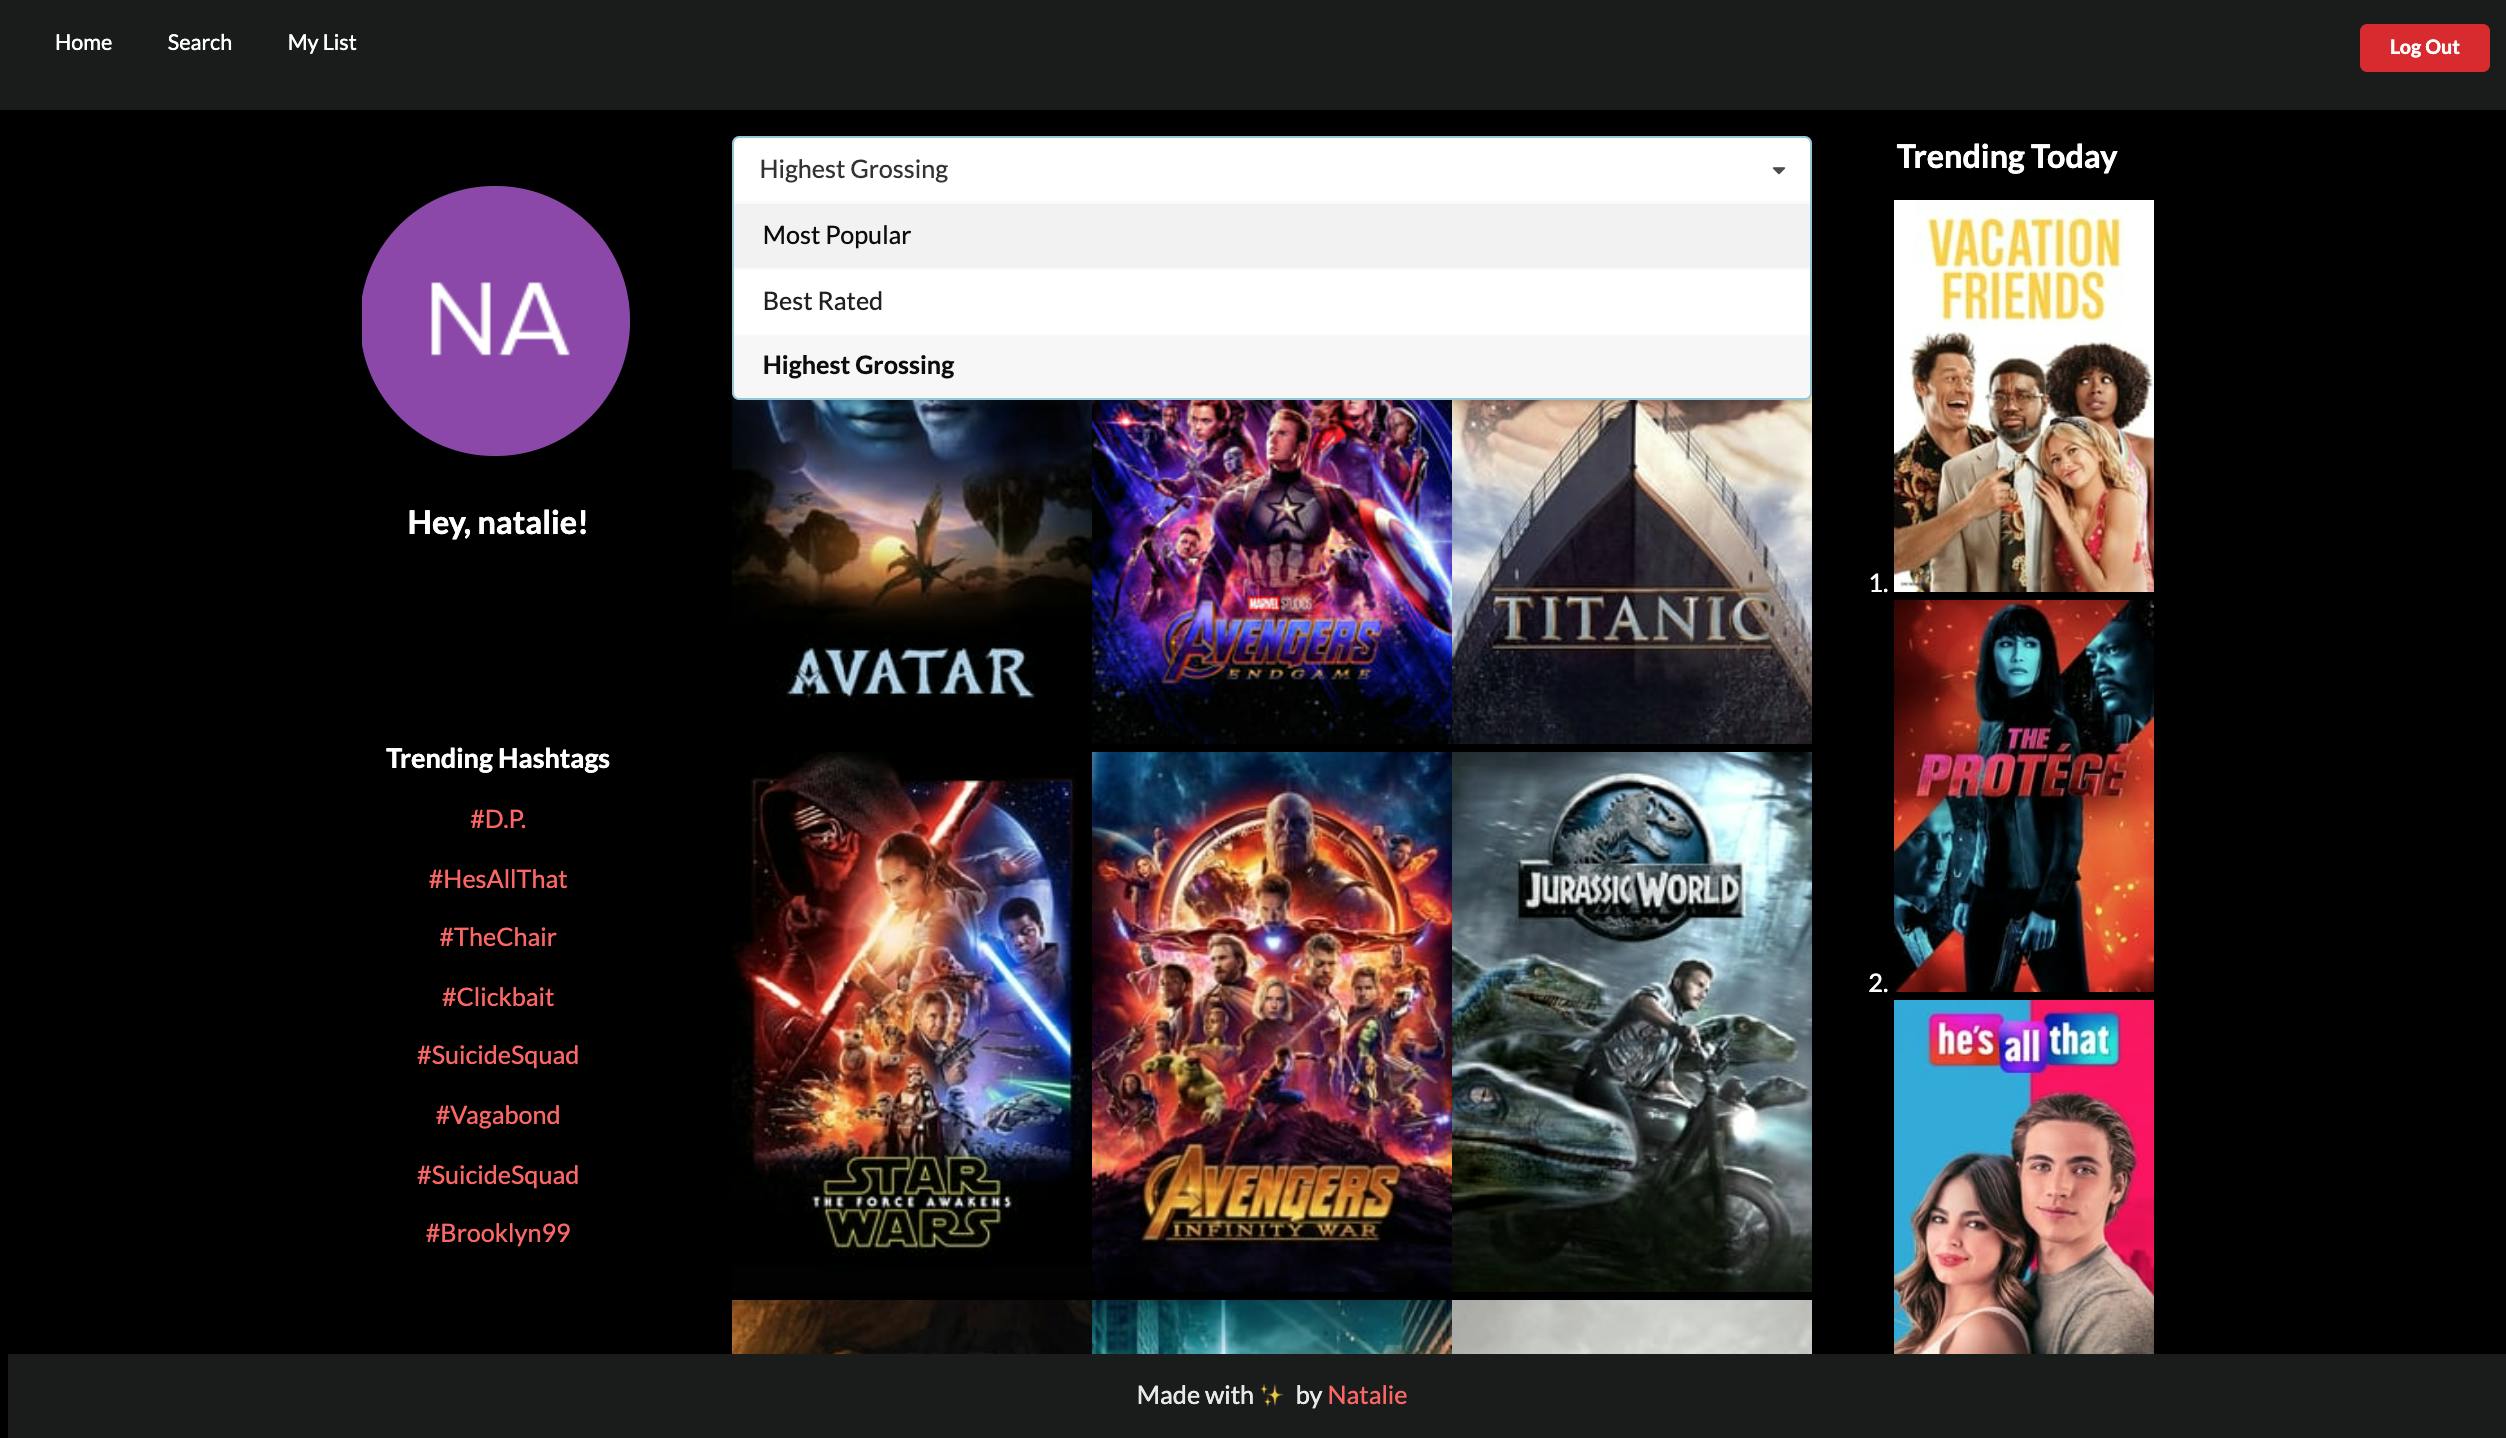
I used the same API to fetch data to show the Most Popular, Best Rated and Highest Grossing films to give some inspiration for users to find what to watch. This is a work in progress as I would like to implement some future features to allow users a more in-depth search experience.
Deploy 🚀
I used Heroku to deploy the apollo-server and used git subtree to push only the api folder. For the front end application I used Netlify. Both are really simple to use and well documented. The data is sent to a MongoDB database and persists in the database.
How to use Popcorn 👩🏻💻
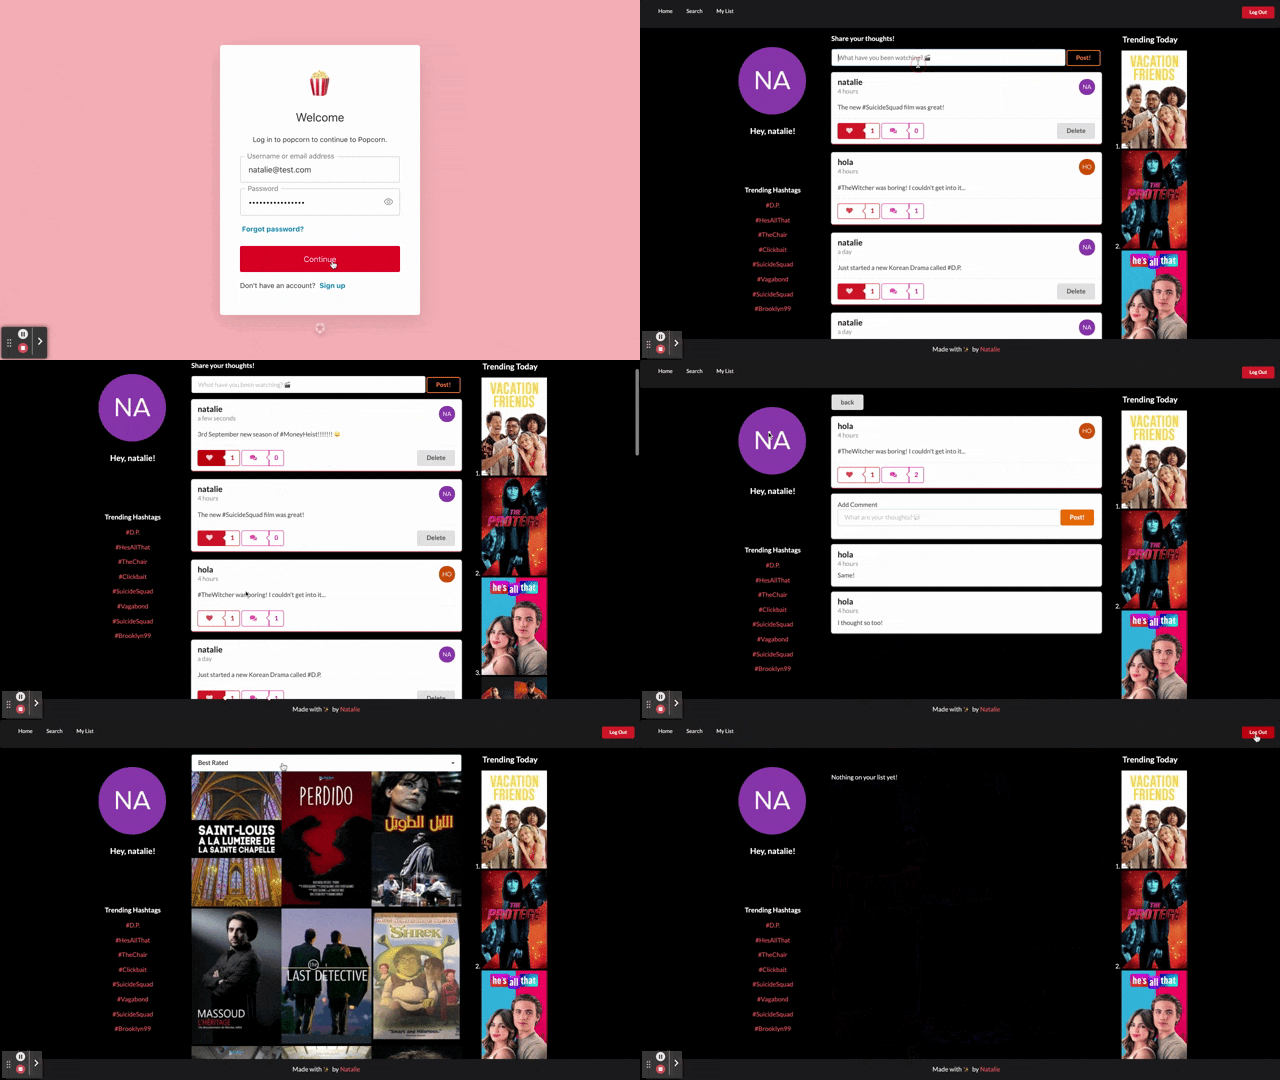
Let me show you how Popcorn works and looks! ✨
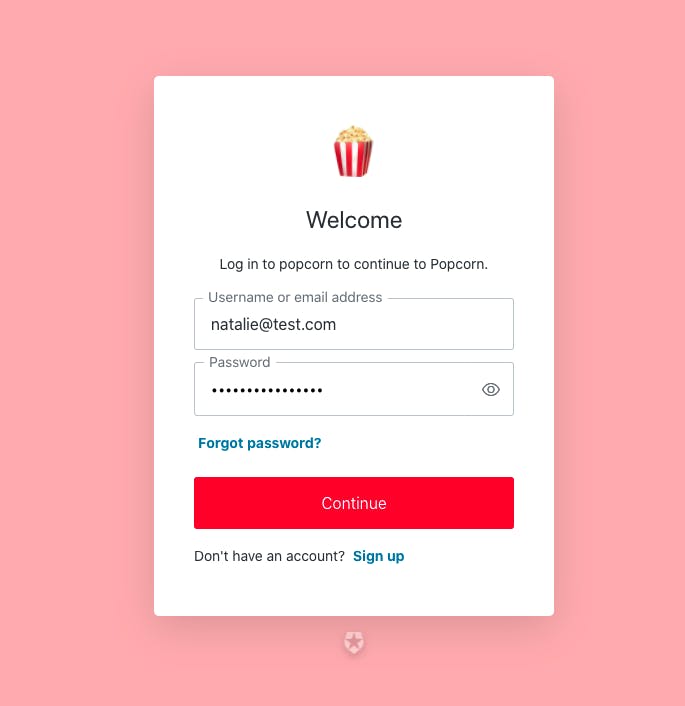
When a new user lands on the home page, or if a user isn't logged in, they will be prompted to before being able to see anything.
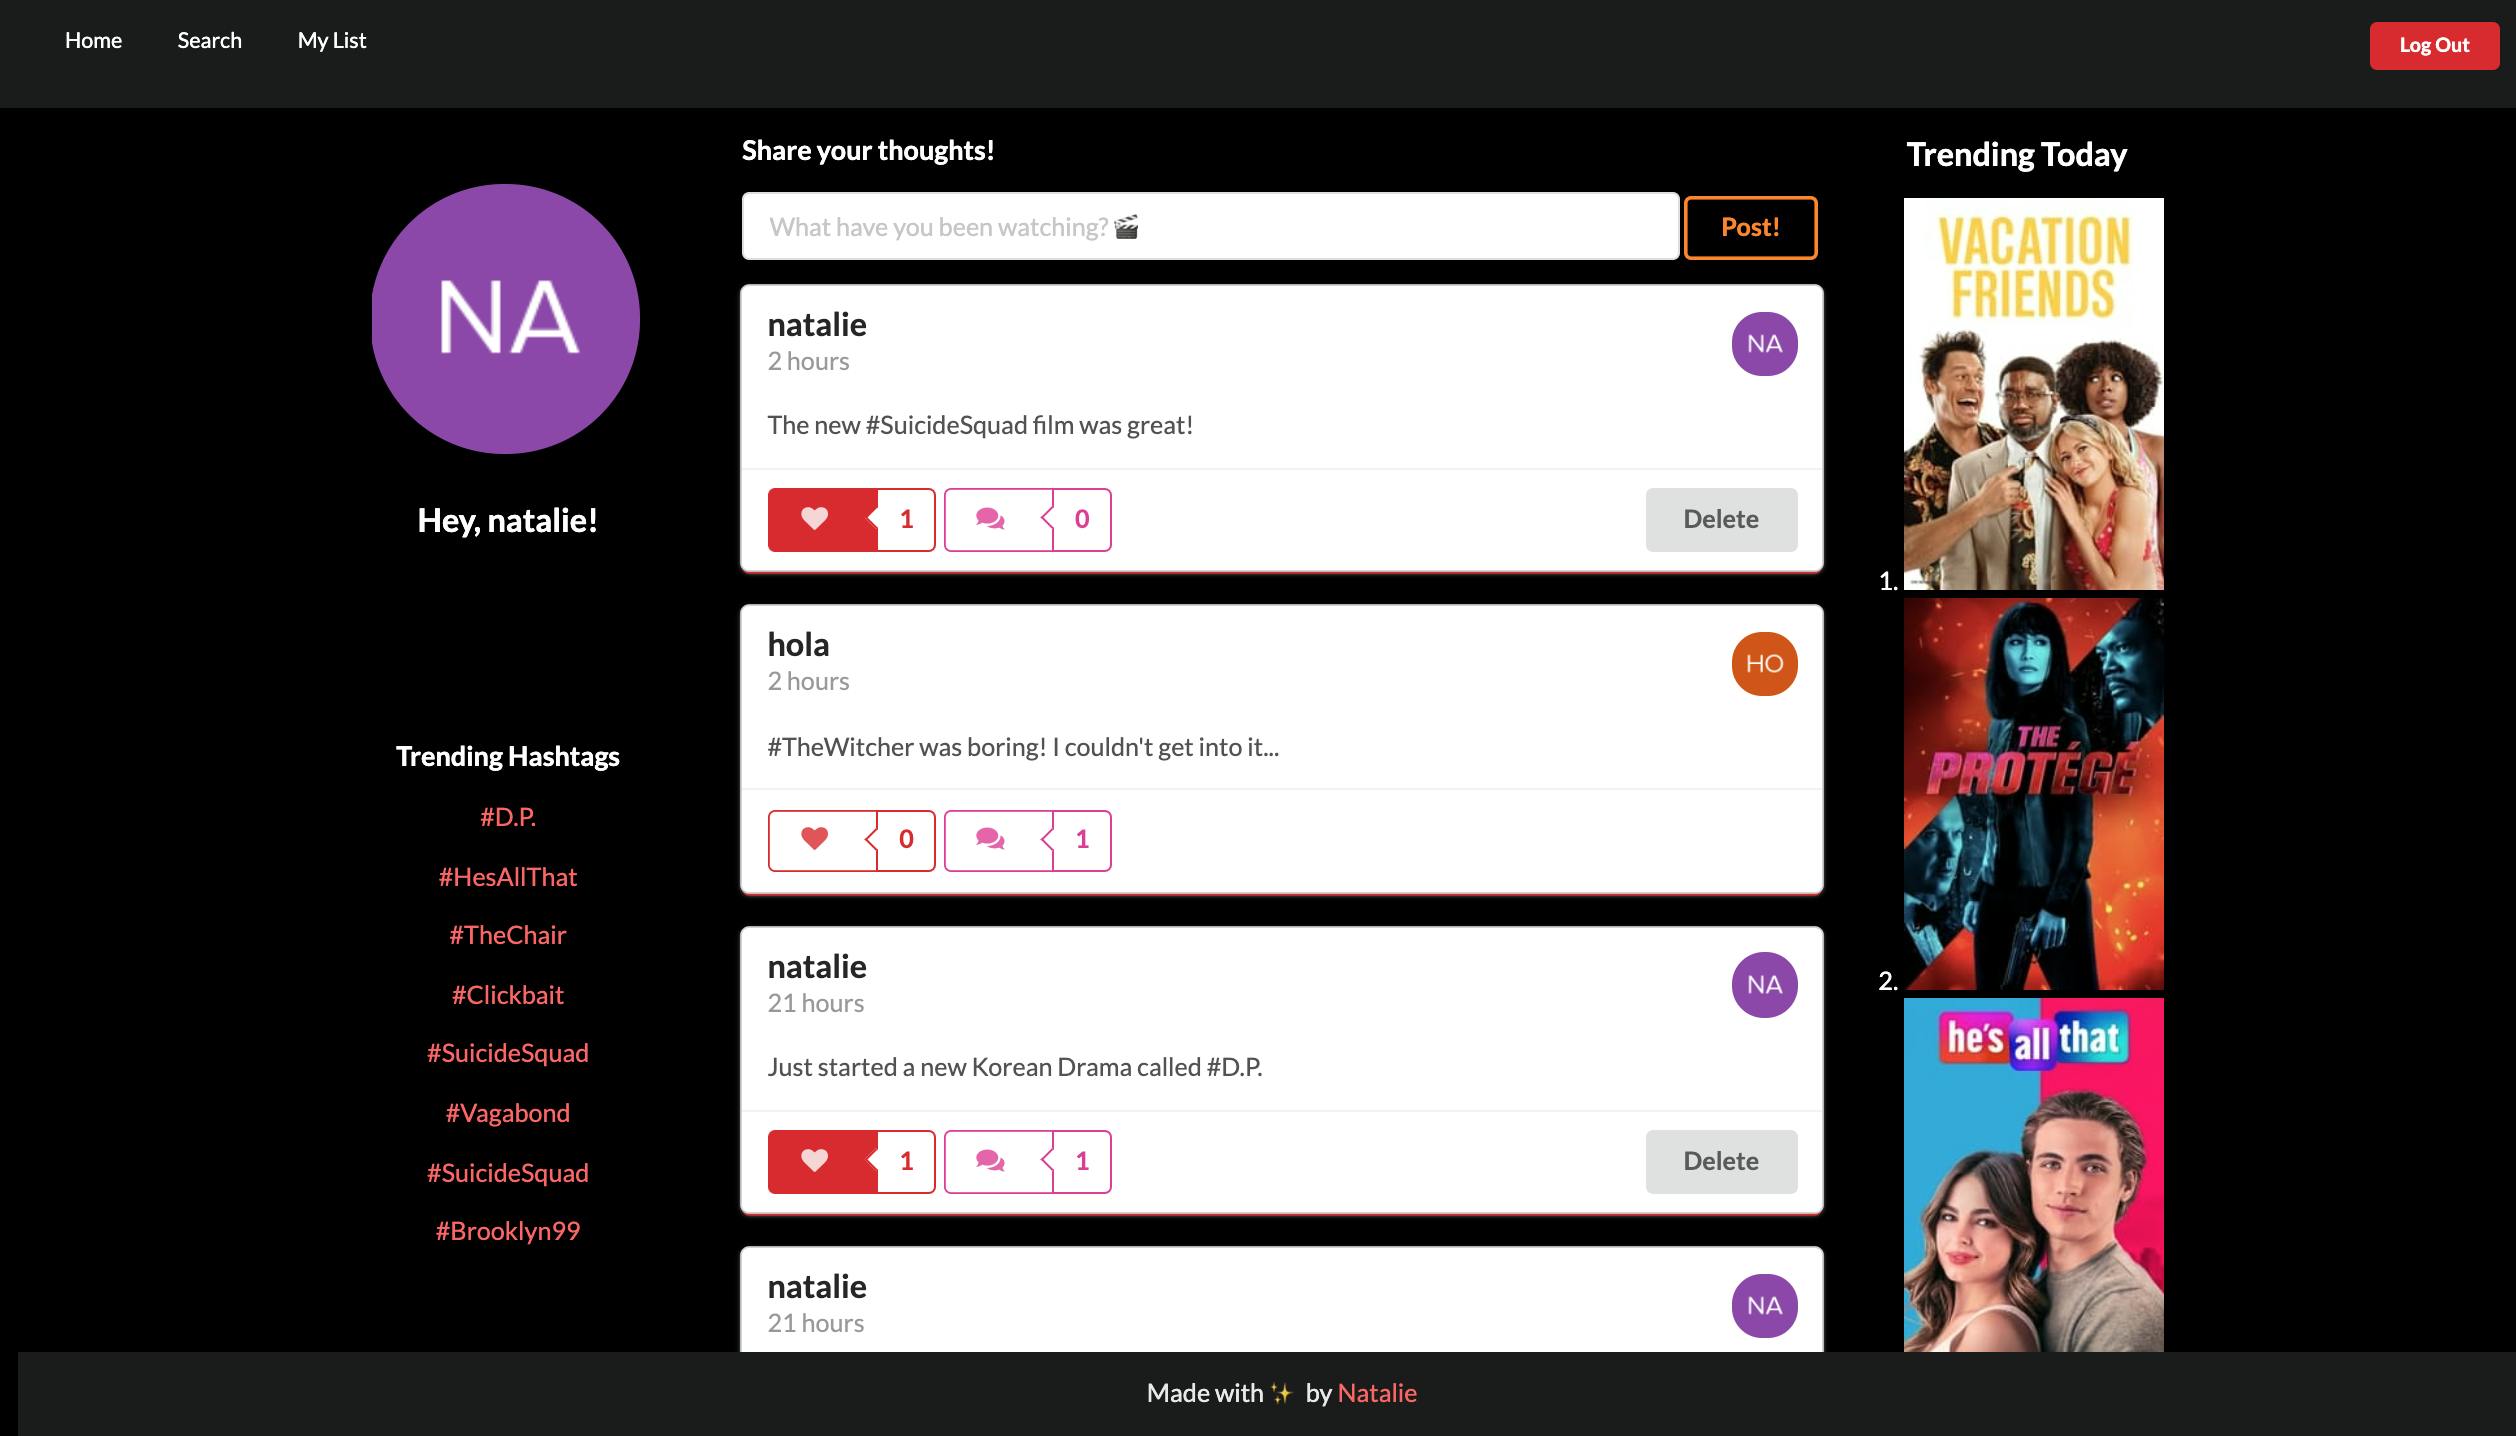
Once logged in you will be able to see your profile, posts feed, trending shows.
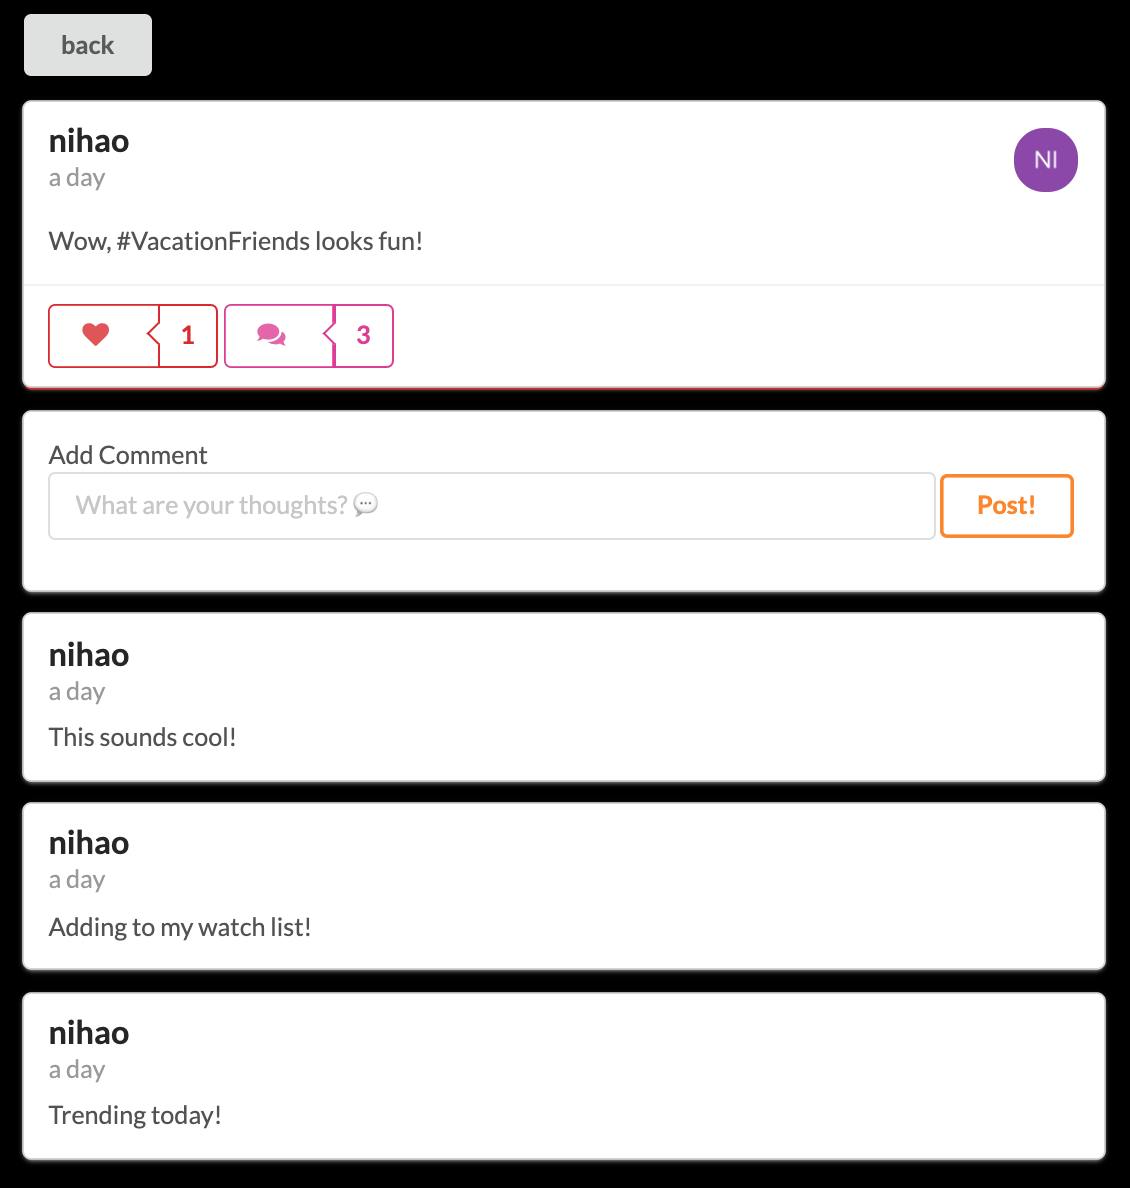
When clicking on a post, you will be directed to a page to add comments to that post and see existing comments
This is the search page which lets you sort by different variables.
Future Features ✨
- Users can add items to their favourites / watch later list
- Sort posts by # Hashtags and show trending hashtags
- Ability to interact with movie poster -> show more details
Challenges 💪🏼
| Challenge | Solution |
| createPost and deletePost not working | add userID parameter |
| empty posts can be created | add missing validation |
| unable to connect to Apollo Client | CORS Policy |
| likeCount and commentCount not showing | fix incorrect fetching query call |
| typeDef errors | use correct ID! or String! |
| shows blank page if user is not logged in | temp fix: protect all routes so users must be log in |
| Netlify build failing if eslint errors found | add environment variables CI=False |
| links to another page in app doesn't open from top of new page | Scroll Restoration |
| .env variable not read in api | install dotenv dependency |
| posting comment on a post will return comment by OP's instead of current user | 🚧 Work in Progress |
| likeButton ternary not functioning properly (if liking other user's posts, button doesn't change color) | 🚧 Work in Progress |
That's all folks, thank you 💖
There were some challenges and struggles along the way. I had some trouble with technologies that I hadn't used before e.g apollo and graphQL. It was also challenging to find time to complete the project within the timeframe alongside working full time job and other commitments. Although Popcorn isn't completed to the standard of my original plan, I am happy with the progress I have made so far! Hope you enjoyed Popcorn.
Any feedback and thoughts is greatly appreciated. ✨
Popcorn 🔗
URL: nat-popcorn.netlify.app
GitHub: github.com/natbibi/popcorn
